Since Braymere did a blog post (thanks a thousand times to her) about my photo challenge, I could read this kind comment...
So I've decided to answer ALL your questions about "outdoor modelhorse photography" with this little chart.
This could help you, or just make you smile but, if you've got any more question after reading this, don't be shy to ask ;)
*
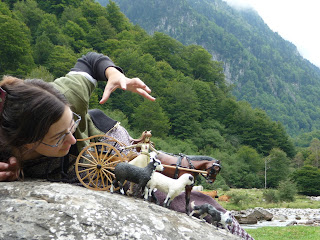
 Beeing an outdoor photographer, means you're gonna go hiking. Or you can just take your car, stops to wonderfull places, take pictures... it's less difficult, but some places aren't reachable without yours feets, and believe me, they are the most wonderful.
I spoke about this side of shootings on this blog post "behind the scene of a shooting".
So let's talk about how to do the best pictures you can!
Tips 1 - Point of view.
If you want realism, you need to roll in the mud.
There's no more secret, because the basic (and I'm gonna remind it) is a low point of view. If you've got this attitude:
Your pictures gonna be taken from too high. It doesn't mean it's gonna be bad, but... less realistic.
This is the attitude to adopt:
You need to adapt yourself to your figurines, to take pictures at their level. And also, not to be too close of your figure, because they are quickly deformed though a camera.
Here's some examples:
Balance at the same level as the horse:
And you can of course, play with your point of view, depending on what you want to inspire...
So, one thing to say: butts in the airs, girls (& guys of course)!
Tips 2 - Beware of the ground!
Nature is easy to have in scale, you just need to take the pictures from the right point of view and to choose an adapted ground.
The perfect grounds, with no worry about scale are: sand, earth, moss and golf grass.
 |
| This perfect grass for the win! |
But in the true nature, you may not have that. Fluffly green grass could be a problem...
Or could be not, if you play the game with it!
First, you can cut some bothering tuft, just be carrefull not to cut rare plants and no more than needed. Because it's nature, and we need to respect it.
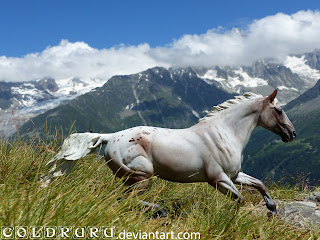
Second, know how grass can look with a real horse. For example, this is a picture of my mare running, with wild grass out of focus:
If this can happend in real, it can also happend to your modelhorse pictures (luckily because it's not rare at all)
You can also easily trick the ground, if you've got a rock with moss or a tree or something to put horse on. It's really the most helpfull way to win your shot.
Another example, is that nature can be gigantic even for real horses, so it could be tolered too. Just choose your plants wisely. Flowers are appealing but generaly out of scale.
Last example, the grass CAN really be out of scale, but usually it's dry and yellow old grass, so check if yours is the same looking type. And if yes, jackpot!
Also, I usually play with high grass, supporting it for my pictures. Let me explain...
For this one, I choose to put the horse directly on the grass, because it plays with the dynamic and the effect that the horse is running out of it.
And for this one, I put the horse directly behind a great plant, that could looks like a little bush for the scale I was picturing. It tricks you a bit because you focus on it and not on the whole messy grass.
Tips 3 - Make the world be in scale, not just nature!
Buildings are a little bit more difficult to have in scale, it demands a little bit more imagination than just nature. You're gonna need more space!
If you have to deal with a very little space or crowded places, you have to take the most closer to the ground picture you can. It gonna helps the figurine to looks big.
If you've got some chance, you'll have a little space, but helps from the ground, like in this case:
You can put the horse directly on the grass or on a rock, low wall or even a car (yes, I did that once or two).
If the situation it really to hard but you really wants the baground, you can just have a headshot or detail picture.
Like, when you've got so much plants on the view or gigantic flowers you want so bad!
The more ideal case is when you've got all the space you need between you and the subject you want, plus an easy or a raised ground.
Put great attention to details, a simple evident out of scale object can ruins it all. So always take several shots of different angles!
 |
| A slightly more close to the ground point of view is always the key to avoid problems. |
If theses rules works with buildings, it also works for almost everything you would want to have in scale. Even animals!
 |
| Bad scale picture, lol. |
Tips 4 - Straight line and dynamics.
Be careful with your skylines, it really matters.
See... this picture of me setting up a scene is not pleasant because of the horizon!
Aren't this better?
Just to be perfectly clear, look that:
But, the skyline aren't always the point of dynamic, so it's a basic rule but it can be forget in some specific cases, as well as if the natural decor is not straight.
So you don't need to be as obsessed (as I am) on this point, but not to forget it ;)
At the end, you're the only juge of your pictures, and you make your choices. But, composition really matters! Just compare these two pictures, the space accorded change the whole feeling, either are interresting, pick the one you juge better:
As well as those shots are dynamics, because...
 |
| the horse is slightly in deformed by the camera, and then follow the curves of the road |
 |
| the horses are leaning to follow the idea of movement, as well as the natural slope of the bg |
 |
| shadow and light contributes to balance hills and sky |
Tips 5 - Splashes
They sure add realism, but...
Sand is pretty easy to splash, but wather less.
So, if you're at least two, one of you can throw little rocks on the water and the other do the pictures. But if you're alone, here's my technique:
-Don't be affraid of wet foot (really).
-Place your figure in the water.
-Be sure the figure is NOT gonna be taken by the water current.
-Choose your framing, take a first picture without splash of what you want. (it would help you focus)
-Be creative to make a stand for your camera, exemple, take some rocks.
-With your main hand you gonna take little rocks to throw, with the other your gonna pull the trigger,
-Be calm and patient, throwing with your main head is better for precision, the stand for the camera gonna help your other hand to keep the camera focus.
-Repeat, as long as needed.
It can be long, it can be difficult, the result is the reward. Really. The following picture was taken by me alone using the technique below, promess.
This shot, is one of my most popular ever (on my gallery), it takes me several shot, I was helped by a friend to throw the rocks on the lake.
Tips 6 - Don't think photoshop is the key.
And here we are, the answer to the photoshop questions.
I was raised by a photographs, my late dad was a master of photoshop (for his work), but he loved the pictures to be perfect without it. So do I. And it's one of my pride.
For me, a great picture, is a picture who don't need photoshop editing, it's a picture I can just open in it to put my watermark on.
I use photoshop for mostly 2 things:
-Editing on colors, because your the toy of the elements and light can really be against you.
-Straight my line and somethimes recut a bit on the composition.
And that's pretty much ALL.
It can happen that I hate a bad grass ruining a good pic, and so the use the magic stamp tool, but it remains rare.
On all the pictures I posted as example on this page, and except the ones usings to example photoshop, only 3 were photoshop edited, and one of them was one of my horse, one for the example of straight line and the last edited on colors and it's pretty obvious, I'm sure you're gonna guess wich one immediatly.
Tips 7 - Be creative!
And it's the most important things, all you need is your imagination, then "talent" will come. In all case, don't bridle yourself!
*
It was a really, really long post to write, and I hope you loved it as much as it could be usefull to you.
And I want to finish it with a GREAT thanks on all the peoples that lives my fantasy.
 |
| Jaf, painter at Hauntedwood Corp. Studio |
 |
| Sabrina, hobbyist & painter at l'Atelier Embrumé |
 |
| Clémentine, hobbyist |
 |
| My mom, best support of all time! |
 |
| Riri, not hobbyist, but the girl with who I started to collect figurines (the manga ones) |
 |
| Niki, manga figurines collector too |
 |
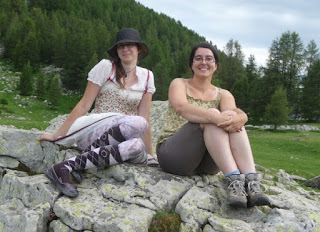
| Louise, very very sporty girl who's always ready for the most difficult hikes! |
 |
| My dad, for his photo teaching among others |


I *love* this post.
RépondreSupprimerAlso, I want to go photographing with you!
You'll be very welcome. So if one day you come to Europe, please let me know, all is possible ;)
SupprimerThis is such a great post. Thank you for sharing!!
RépondreSupprimerThanks to you for reading!
SupprimerHi There!
RépondreSupprimerFirst of all, I am always inspired by your photography to try it out myself. In which, I have. Though, I've run into a bit of a problem. I have been trying out competing in photo shows like MEPSA lately and have found from the judges that I have poor lighting or the lighting is coming from the wrong angle. They are wanting the lighting to be directed to the side of the horse, which I assume to enhance details and features. However, I prefer to take my photos outside - including with an indoor arena panel I had built that could be set up outside with natural "stuff" visible through the windows. Granted, yes, I have been taking most of my pictures with a little Casio camera where all the settings are auto. I have been trying to switch over to using a manual camera. Though due to my nearsightedness - I have a tendency to get the camera (both of which) relatively close to the subject....and therefore making it completely blurry to fuzzy edges. How would you suggest for me to step up my game and get some higher quality photos that could be potential champions?
~Daphne
I drop you a comment on your blog ;).
Supprimer